Signal LCC Boot Fix.
Boot Loader Upgrade
Note: This Boot Loader upgrade is ONLY required for nodes that
experience (or may experience) problems with slow rising power supplies
(node comes up in bootloader mode with flashing yellow led).
Download the SignalBootfixer_v20.hex
file to your normal default file space. Also download the latest Signal
LCC firmware update (e.g. SignalLCC_C7c_UPDATE.hex)
to the same location.
- Start JMRI V4.8 or later and select "LCC" (or "OpenLCB").
- Select ‘Firmware Update’ from the LCC drop down list.
- From the 'Target Node ID' drop down box, select the
Signal LCC node to be upgraded.
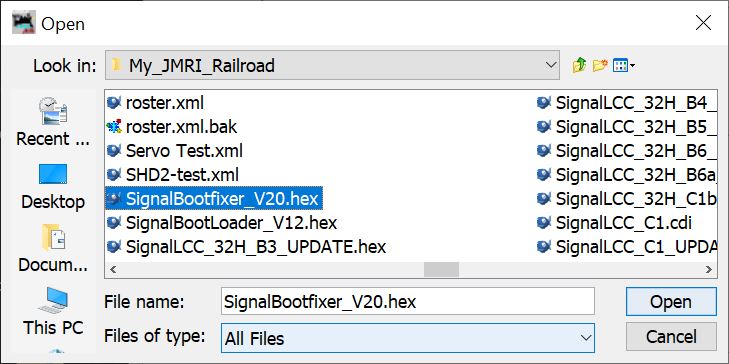
- Click [Select] to pick a firmware file.

- From the file menu, select this file:
'SignalBootfixer_V20.hex'.

- Click [Open] and leave 'Address Space' at '239'; do not check
'Lock Node'.
- Click [Load] to download the new boot loader V2.0.
- During the download the Gold led will blink to show that the node
is in 'Boot Loader State'.
- The progress bar on screen will now fill up to 100%, on the node
the Blue and Red led show bus activity.
- After some time the message "Operation Complete" should appear
near the bottom of the window.
- The Gold led will continue to blink, because the node will
remain in 'Boot Loader State'.
- Do not close the 'Firmware Downloader' window at this time,
leave it open.
- From the OpenLCB menu, click 'Configure Nodes' and select the
(partially) updated node.
- It should now show 'Mod: Signal-LCC Bootloader' and 'Software:
v2.0'.
- Do not close the 'OpenLCB Network Tree' window at this time,
leave it open and proceed to Firmware Upgrade step #3 below.
Firmware Upgrade
If an update to your Signal LCC firmware is needed, a program such
as "Firmware Update" in JMRI version 4.80 or later is required. Download
the latest firmware version to your local JMRI User Files folder.
To enter Firmware upgrade mode:
- Start JMRI and select "LCC". (or "OpenLCB")
- Select ‘Firmware Update’ from the LCC drop down list.
- Select your 'Target Node ID'. If you have just completed the
boot loader upgrade it should still be selected.
- Click [Select] to pick a firmware file.
- From the file menu, select: 'SignalLCC_C7c_UPDATE.hex' (or the
latest upgrade available.)
- Optionally you may check the ‘Lock Node’ check box to take it
off line during the upgrade.
- Click the [Load] button to initiate the upgrade to Signal LCC
revision C7c. (or later)
- Wait till you see "Operation Complete" at the bottom of the
window.
- Switch back to the OpenLCB Network Tree window.
- Close the map container of the updated node by clicking it.
- Re-open (refresh) it by clicking it again.
- It should now show 'Mod: Signal-LCC' and 'Software: rev-C7c'.
- Any errors will be shown in the lower window ticker tape
display.
Note: If the node does not automatically enter boot mode and start the
upgrade it may be forced into boot mode by un-powering it, then holding
down the ‘Gold’ button as you power it up again. The gold LED should
start blinking to indicate that it is in forced boot mode. This will
also likely be required after a failed upgrade attempt.
Normally upgrades to the Signal LCC node may be accomplished without
physical access to the board itself. However if the node does not
automatically enter boot mode and start the upgrade it may be forced
into boot mode by un-powering it, then holding down the ‘Gold’ button as
you power it up again. The gold LED should start flashing to indicate
that it is now in forced boot mode. This will also likely be required
after a failed upgrade attempt.

